Along with spurring the release of a frenzy of apocalyptic books, the roll-over of the ancient Maya calendar is also helping spawn renewed tourist interest in Maya ruins. Not to miss out on the opportunity (and free publicity), Mesoamerican communities are hosting a number of special events to celebrate the historic occasion. And governments in what was once the Maya realm have funded a new wave of restoration projects at ruin sites.

So regardless of whether your driving interest is culture, history, art, or archaeology, you may well be considering (if not yet planning) a photography trip to the Maya realm. If this is the case for you, please allow me to give you a few pointers based on my experiences in the area.
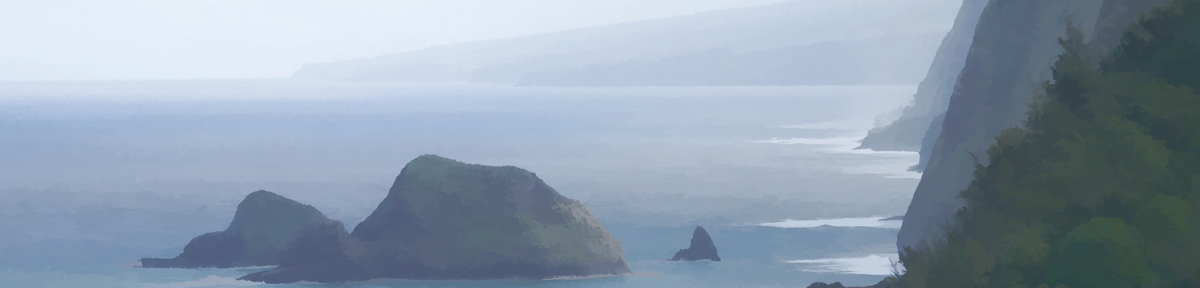
The Seasons
The Yucatán Peninsula basically has just two seasons: wet, and dry. For a visiting photographer, each has its plusses and minuses.
The wet season runs roughly from June through October — and as you’d expect, brings frequent rains. But the rains tend to come in the form of late afternoon showers — so they hit fast and strong, but are over in a few hours. The wet season is also hurricane season, although that particular travel hazard peaks at the end of the wet, in September and October. On the bright side, vegetation is at its best during the wet season, and morning skies can be very clear. Most uncomfortable is the fact that the wet season is also bug season, and most bite.
The dry season spans November through May, and in general is a more pleasant time to visit. The bugs dissipate as the Yucatán dries out, and the dryer weather leaves you the whole day for exploring. The only real disadvantages are that the shooting environment can get hot and dusty as the dry season wears on, so capturing blue skies in your shots gets trickier. May is particularly dicey, since it’s the month when farmers burn their fields to clear them. Depending on how close your stay is to agriculture, you can be in for a smoky time. The vegetation looks more sparse and less photogenic as the dry season wraps up as well (it’s essentially the tropics’ version of winter).

Belize on a smoky day in late May
The most comfortable time to see the Yucatán is early in the dry season, December through March. But of course, this is well known — so this is high season for tourism. Between Christmas and Easter in particular, accommodations are at their most expensive and “marquis” sites get crowded quickly.
Personal Safety
Maya archaeological sites are generally in high-poverty areas, so you should expect a background level of petty crime. There will be pickpockets in crowds, unattended gear can grow legs and walk off — it’s nothing you haven’t faced before if you’ve ever travelled in a less-developed part of the world. Keep your wits about you, and an eye on your gear, and you shouldn’t have any problems.

Looking out our window in Tulúm Pueblo: standard yard protection in a good neighborhood
Narcotic-related crime gets lots of press coverage, and for good reason — about 65% of Mexico is considered by one government or another to be severely impacted by drug-related violent crime. Fortunately, Maya areas of Mesoamerica (including Mexico) are still considered to be safer than other areas on this count. In any case, you should double-check on the situation before you go. The U.S. State Department publishes up-to-date information on the safety situation in various areas, other governments do similar things for their residents.
Fortunately, some safety precautions can be both simple and cheap. Just keeping a low profile can help keep you from looking like a target. I covered all the shiny (silver / gold colored) parts of my camera and lenses with black “gaffer” tape to make my gear look less appealing to potential thieves. I took an old unlocked GSM cell phone (purchased for $20 via eBay) for calls from the road — pre-paid country-specific SIM cards are easily purchased on the internet. It’s also a good idea to dress down, unless you’re out for a night on the town in a resort district.
Carry any necessary valuables in a travel wallet around your neck, or in some other pouch hidden under your shirt — not in a pants pocket or a purse. When you’re in town or riding busses, carry your photographic gear in something that doesn’t look like a camera bag — maybe in a thrift-store backpack that’s showing some wear, or a non-flashy messenger bag. You can use inserts to turn almost anything into a camera bag these days.
Photography Restrictions
Along with site-specific restrictions on photographic gear, there are some broader ones you’ll need to keep in mind too.
Mexico treats its archaeological sites as outdoor museums, so you can’t use “professional” photography gear there without prior written permission — tripods in particular are explicitly forbidden. By the way, “prior written permission” involves filling out paperwork in person in Mexico City, so you’re well advised to save yourself the headache and just reserve your tripod for use outside of ruins. When I checked the permission forms for “professional” gear, aside from tripods they only mentioned “special” photographic equipment. You’ll want to do your own due diligence, but my reading of the situation is that a good camera is fine, but you should leave the lighting stands and large reflectors at home. For what it’s worth, I’ve carried a “pro-grade” DSLR, flash, and handful of lenses through dozens of ruins and have never been hassled at any of them.
In Mexico, every ruin levies an extra charge for use of camcorders and other video cameras — in 2011, this was only M$45 (about $4 US). Oddly, you don’t get have to pay extra if you record video with a DSLR or point-and-shoot camera — but I suspect that it’s only a matter of time until they get wise to this “loophole.” Some sights also ban flash photography, but this is the exception rather than the rule; look for signs near any given site’s entry for restrictions specific to the site.
Maya sites in Guatemala and Belize don’t tend to have as many limits (in particular, tripods are OK), although some are even more restrictive in specific places. For instance, photography is banned entirely in the on-site museums at the ruins of Tikal.

Tikal: cameras are welcome, but only outdoors
Gear Suggestions
Presuming you’re taking a DSLR on your trip (vs. a high-quality point-and-shoot, or modern rangefinder), you’ll want to give some thought to the lenses you take so as to reduce the weight you carry around. On a recent trip to the Yucatán, I was well served by a DSLR and 3 lenses with (full-frame equivalent) focal lengths of 14-28, 24-120, and 100-400 mm. But of course, what you take is a function of your luggage, endurance, and patience.
At some ruins, spaces between structures are kept clear — these aren’t terribly demanding in a photographic sense since you can “zoom with your legs”. But a number of sites (generally those opened to tourism more recently) have trees growing right up to structures, so for those cases a wide angle lens will be a big help. A long lens (200 mm or longer) is particularly handy for shots from the top of one pyramid to another, or to capture details high on building walls. At most sites, though, a mid-range “walk-around” lens will do most of your work. Depending on what time of year you visit, weather-sealing will be more or less important in your camera gear.

One cheap piece of gear that will prove handy almost anywhere you go is a “string-pod.” They’re a big help in low light when you can’t use a flash or a tripod — namely, in most museums. Best of all, it’s simple to make one yourself if your gear budget is running low. It’s also helpful to take a GPS tracker, and keep it charged (or have spare batteries for it). They make it much easier to sort out what’s what in your photographs when you get home (and allow you to geotag your photos too, if you’d like). Taking and maintaining a photo log can also come in handy — just note down when you entered and left a ruin, how many pictures you took and on what memory card, etc.
Take at least one way to back up your images (two would be better), as protection in case a memory card fails or gets lost part way through your trip. I had a memory card fail on a recent trip, and two days of images from Tikal were saved only because I had backed them up on my iPad. Keep your backup(s) in a different bag than you’re carrying your camera in, so your backups are safe even if your camera gets lost or stolen. Bear in mind that WiFi can be hard to find in the Yucatán, and mere mortals can’t afford international data roaming rates on cell phones — so “the cloud” is unlikely to help you when it comes to backing up your images.

You should definitely take extra camera batteries, particularly if you’re going to visit more far-flung sites like Tikal. Power lines haven’t been extended to the park yet, so hotels within the park boundaries only have power for a few hours each day (when generators are running).
I took three batteries for my DSLR — one was always in the camera, another was always in the camera bag to serve as a spare, and the third was always in its charger. When you get back to your room at the end of the day, you rotate the three batteries (camera battery to charger, spare battery to camera, charged battery to spare) and you’re ready for the next day. Keep things simple, make this rotation a habit, and you never have to worry about running out of power.
Planning ahead
Particularly if you visit in (Northern Hemisphere) summer, you’ll need to drink LOTS of water while you walk through the ruins. Since water isn’t available for purchase at some sites, this means you’ll often need to pack 4 liters of water (or more) per person per day when you head out in the morning. And of course, most tap water isn’t safe to drink in these areas, so you’ll most likely be packing bottled water. You can often get it for free at your hotel, but in any event you’ll need to make water logistics part of your morning checklist. I took a UV water sterilizer (made for backpacking) as a backup — it makes local tap water healthy if not necessarily tasty, but I’d recommend one if you’ll be visiting some of the more off-the-grid sites.
Skype (or some other VOIP software) on a smartphone is a good backup to a local cellphone in a pinch (if your travel phone breaks, or runs out of minutes). Check before your trip to see if WiFi is available in places you’ll be staying, often it’s available at cyber cafes in larger towns if you’re not staying at a hotel or B&B with this service.
If you’re like me, you’ll find it impossible to have as much time at sites as you’d like — you’ll need to do some homework in advance, so that you can use your time strategically. You should also make sure you’re in decent shape before you leave on your trip, and take comfortable (closed) walking shoes or boots. You can easily cover 10 or more miles a day hiking around Maya sites, and sandals just won’t do the job in many places (few trails in archaeological sites are paved).
Conclusion
A trip to see Maya ruins is the trip of a lifetime, and there’s even more to see than usual this year. Particularly if you live in the western hemisphere, few adventures are both as interesting and as achievable. So go have fun and take lots of pictures — you won’t regret it!